


Free Shipping Australia Wide

A $7 flat white from your local cafe and the one you pull at home can come from the same beans, the same grind and a machine of similar quality. The difference usually sits in the small tools on the bench: what weighs the dose, what levels the bed, what compresses the puck and what keeps the group head clean.
This guide sorts the espresso accessories that change what ends up in the cup from the ones that mostly change what ends up on Instagram. It covers what to buy first, what size fits your machine, what changes if you own an automatic, and how to use your own bad shots to work out which accessory you are missing.
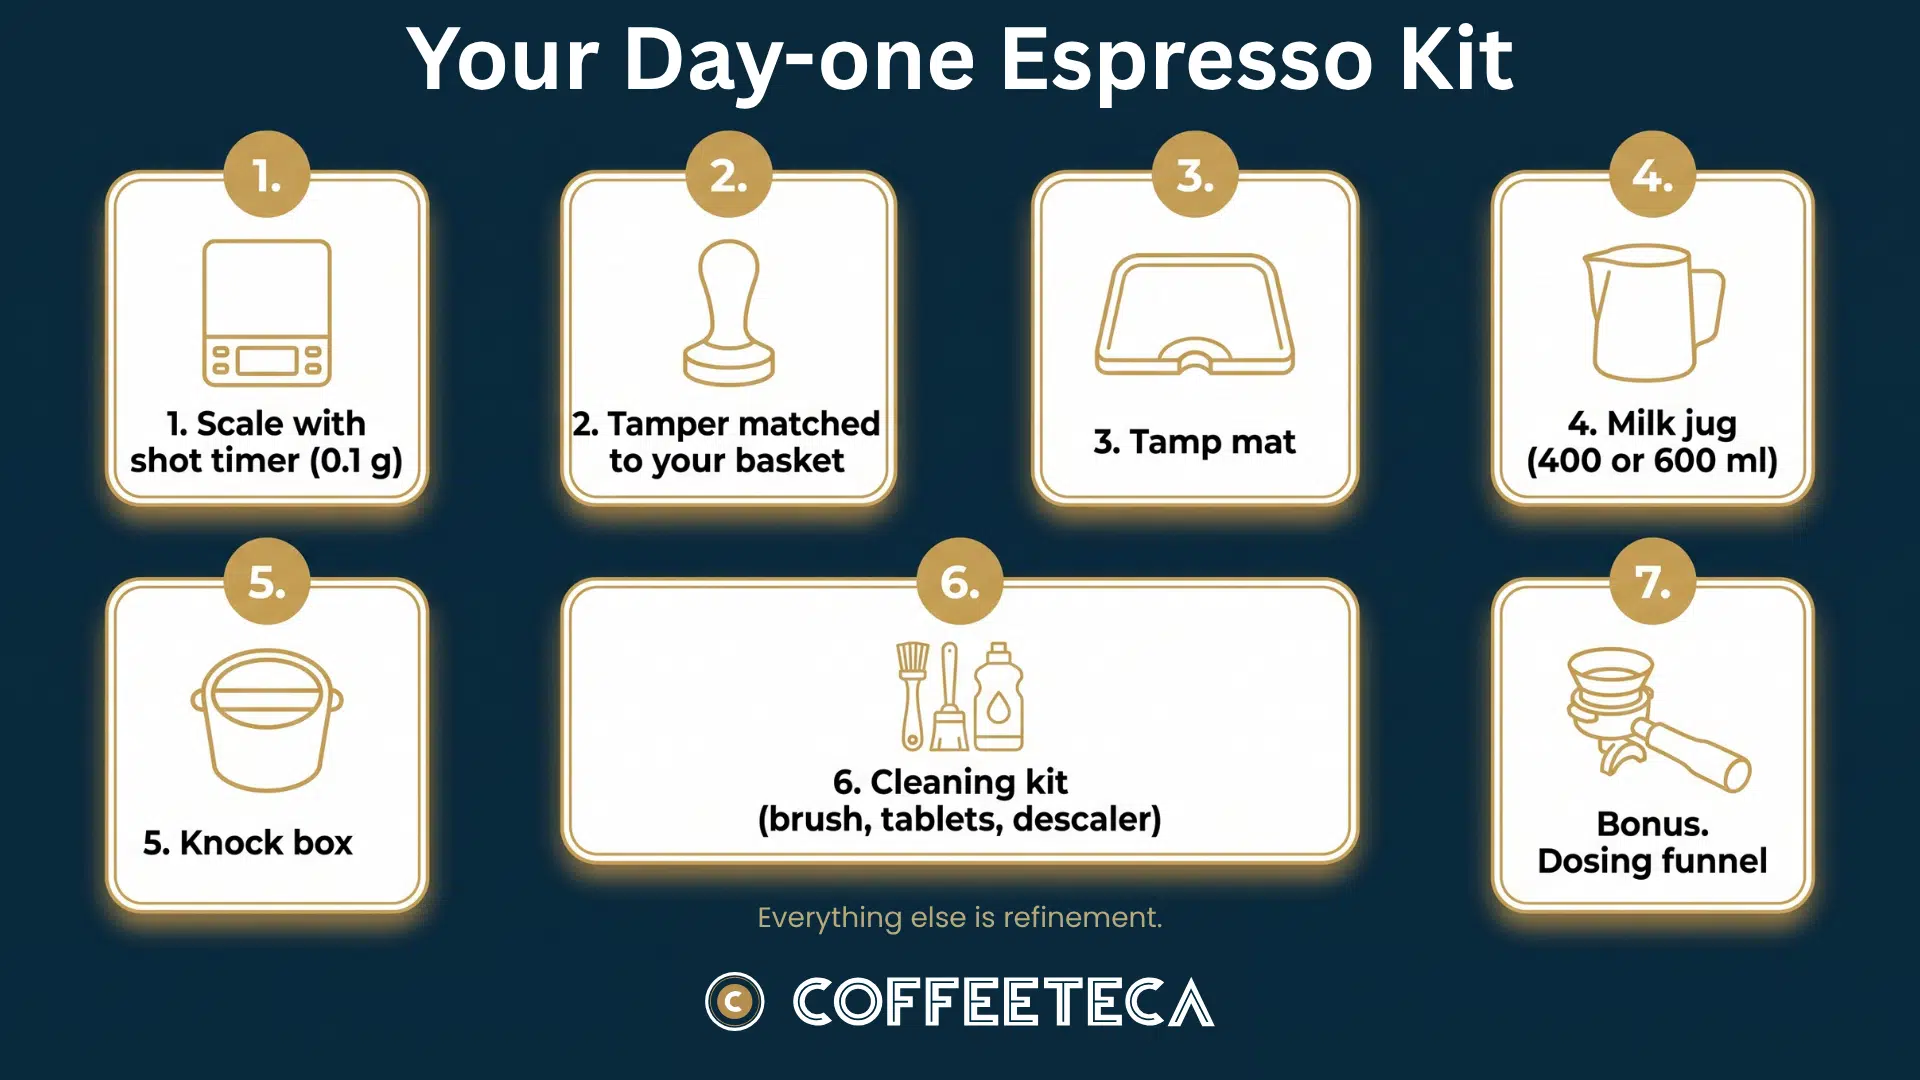
For a manual espresso machine, you need six things: a scale with a timer, a tamper that fits your basket, a tamp mat, a milk jug, a knock box and a cleaning kit. A dosing funnel is the seventh, and the cheapest upgrade with an immediate result.
Everything else (levellers, precision baskets, bottomless portafilters, dosing cups) is refinement. Worth having once your technique is consistent, but not what separates a sour shot from a sweet one in your first month.
The test for any accessory: does it make your shot more repeatable, protect your machine, or make your morning faster? If it does none of those, it is decoration.
One item sits outside this list entirely. Your coffee grinder is core equipment, not an accessory, and it has more influence on extraction than every tool in this guide combined. If you are choosing between a better grinder and a bench full of gadgets, buy the grinder.
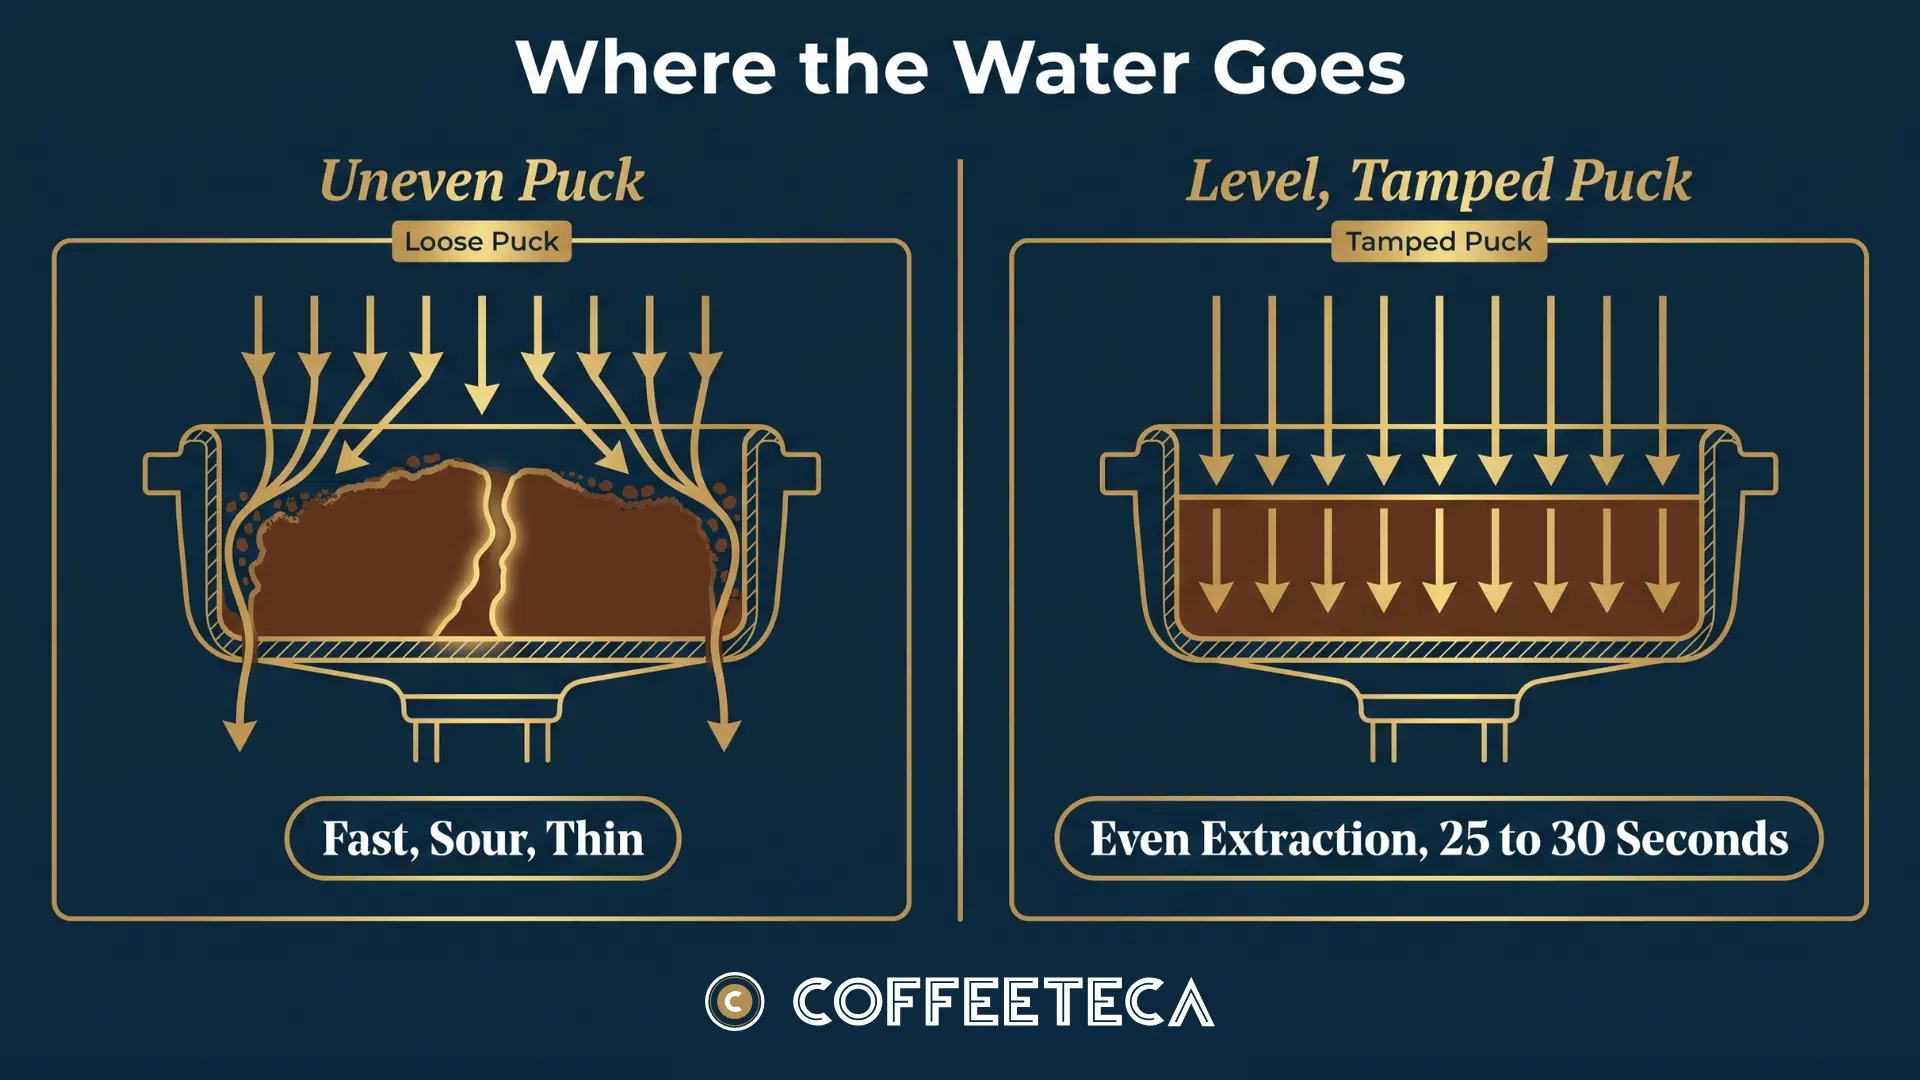
Espresso is unforgiving because it is fast and pressurised. Water is pushed through a compressed bed of coffee at around nine bars for roughly 25 to 30 seconds, and it will always take the easiest route. If the bed has a weak spot (a loose edge, a clump, a low side), water rushes through it and leaves the rest of the coffee under-extracted.
Channelling: when water finds a gap or weak point in the coffee puck and flows through it instead of evenly through the whole bed. It is the most common cause of thin, sour or harsh home espresso.
Four variables decide whether channelling happens, and each one has a matching accessory:
| Variable | What goes wrong without control | The accessory that fixes it |
|---|---|---|
| Dose | Guessed doses shift your ratio every shot | Scale with 0.1 g resolution |
| Distribution | Grounds pile in the centre and clump | Dosing funnel, leveller, dosing cup |
| Tamp | Loose edges and tilted pucks | Correctly sized tamper and tamp mat |
| Cleanliness | Old oils and scale change flavour and flow | Brush, cleaning tablets, descaler |
Get all four under control and a mid-range machine will pull shots that taste like they came from a commercial one.
A scale is the single most useful espresso accessory because it turns your coffee into a recipe you can repeat and adjust. Without one, you cannot tell whether a sour shot came from the grind, the dose or the yield.
Look for 0.1 g resolution, a built-in timer and a footprint that fits on your drip tray. The Digital Coffee Scale with Shot Timer lets you tare the portafilter, weigh the dose and time the shot from one display.
A reliable starting recipe for a double shot:
Keep the recipe fixed and adjust the grind until the time lands in that window. Change one variable at a time.
If you run a grind-by-weight grinder such as the Eureka Mignon Stark, your dose is handled at the grinder. You still need a scale under the cup to measure yield.
The plastic tamper that ships with most machines is the weakest link in a home setup. It is usually light and undersized, which leaves a ring of loose coffee around the edge of the puck. That ring is exactly where water escapes.
Fit matters more than the handle, the weight or the finish. A tamper should sit snugly inside the basket with almost no gap at the wall. For 58 mm machines, the 58mm Coffeeteca Tamper is weighted stainless steel with a flat base, which is all a good tamper needs to be.
If you want the tamp removed as a variable entirely, the Eureka Mignon Automatic Tamper applies the same pressure every time. It suits busy households and small offices where several people make coffee on the one machine.
A tamp mat gives your portafilter a stable, level edge to rest against while you tamp. Without one, most people tamp with the portafilter spouts resting on the bench, which tilts the basket and produces an uneven puck.
The Gaggia Tamper Mat has a dedicated spot for a 58 mm tamper and a grippy silicone surface that protects stone and timber benchtops.
Most Australians drink milk-based coffee, so the jug matters as much as the shot. The size of the jug controls how the milk spins under the steam wand, and that spin is what creates silky microfoam rather than stiff bubbles.
| Jug size | Best for | How much milk to start with |
|---|---|---|
| 350 to 400 ml | One flat white or latte at a time | About 150 to 200 ml |
| 600 ml | Two drinks at once, cappuccinos | About 300 to 350 ml |
| 900 ml and above | Entertaining, offices, back-to-back drinks | About 450 ml and up |
Fill to just below the base of the spout. Milk expands as you aerate, so a jug filled too high overflows before it is textured. Use milk straight from the fridge, because colder milk gives you more time to stretch it before it reaches temperature.
A knock box is where spent pucks go. It sounds optional until you have tapped a portafilter against the side of the bin a hundred times and chipped the rim of the basket.
A dedicated knock box with a padded bar protects your portafilter, keeps grounds out of the sink and makes back-to-back drinks much faster.
Cleaning products protect the most expensive thing on your bench. Coffee oils build up on the group head and inside the shower screen within days, and they turn rancid quickly. Scale builds inside the boiler every time you heat water. Both change the flavour of your coffee long before they cause a fault.
At minimum, keep these on hand:
Browse the full cleaning supplies range for machine-specific options.
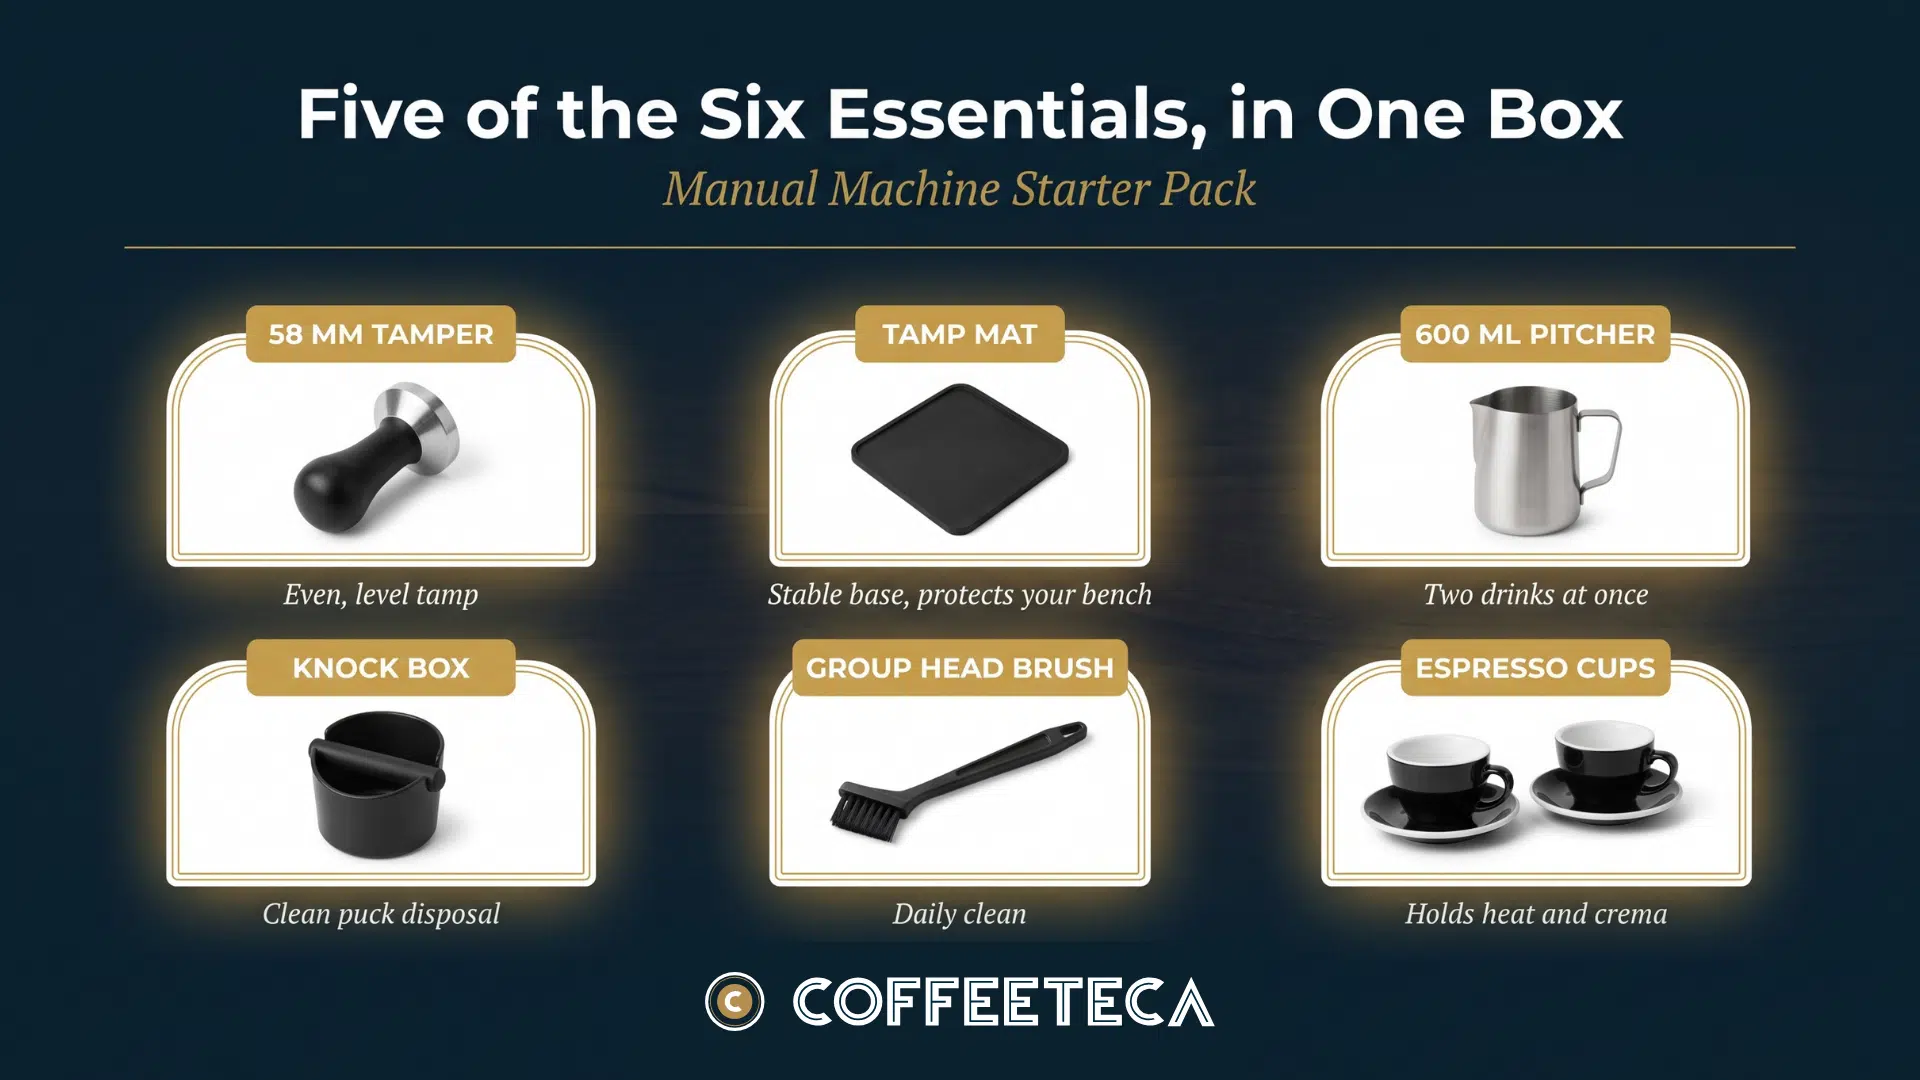
If you would rather not assemble the kit piece by piece, the Manual Machine Starter Pack bundles a 58 mm tamper, tamp mat, 600 ml milk pitcher, knock box, group head brush, six espresso cups and 1 kg of coffee. It covers five of the six core accessories in one order.
Match your tamper to the inside diameter of your filter basket, not the outside of the portafilter. Most traditional Italian espresso machines use a 58 mm basket, which means a 58 mm tamper.
| Machine | Basket size | Tamper size |
|---|---|---|
| Gaggia Classic (E24, GT and earlier Classic models) | 58 mm | 58 mm |
| ECM, Izzo and Quick Mill (E61 group machines) | 58 mm | 58 mm |
| WEGA | 58 mm | 58 mm |
| Eureka espresso machines (Pura, Costanza) | 58 mm | 58 mm |
| La Pavoni lever (manufactured from 2000 onwards) | 51 mm | 51 mm |
| La Pavoni lever (manufactured before 2000) | 49 mm | 49 mm |
If you own a La Pavoni and are not sure of its age, measure before you order. A two-millimetre difference is hard to see by eye and impossible to work around once the tamper arrives.
Once you know your number, browse the tampers and portafilters range.
Your bad shots tell you what to buy next. Most accessory guides list tools in isolation. A faster way to choose is to start with the problem you are seeing in the cup or the puck, then match it to the cause.
| What you see or taste | Most likely cause | Accessory that fixes it |
|---|---|---|
| Shots taste different every morning with the same beans | Dose is changing shot to shot | Scale with 0.1 g resolution |
| Shot runs fast, tastes sour and thin | Channelling or under-dosing | Scale, correct-size tamper, dosing funnel |
| Coffee spurts or sprays sideways from the basket | Uneven distribution, clumps in the bed | Dosing funnel, leveller, bottomless portafilter to confirm |
| Spent puck is wet and soupy | Dose too low for the basket size | Scale, or a basket matched to your dose |
| Grounds on the basket rim, drips around the group | Spilled grounds stopping the gasket sealing | Dosing funnel |
| Milk has big bubbles and goes flat quickly | Jug too large or too full for the drink | Correctly sized milk jug |
| Coffee tastes bitter and dull after a few weeks | Oil build-up in the group head | Cleaning tablets and backflushing |
| Longer heat-up, weaker flow, louder pump | Scale build-up in the boiler | Descaler |
Fix the problem in the top half of the table first. Dose and tamp problems hide every other issue, so a leveller or a new basket will not help until those two are sorted.
Puck preparation tools improve consistency once your dose and tamp are already reliable. Buy these when your shots are good most of the time and you want them good every time.
A dosing funnel sits on top of the portafilter and keeps grounds inside the basket while you grind and distribute. Spilled grounds quietly turn an 18 g dose into a 16.5 g dose, and coffee on the basket rim stops the group gasket sealing properly.
Eureka owners have two magnetic options. The Eureka Libra Dosing Funnel is built for the Mignon Libra grinder, and the Eureka Mignon Dosing Funnel fits portafilters between 57 and 58.3 mm, plus 53 mm.
Ground coffee lands in the basket in a mound, often with clumps. Distribution means breaking up those clumps and spreading the coffee evenly before you tamp, so the tamper compresses a flat bed rather than locking in a lopsided one.
Many home baristas stir the grounds with a fine needle tool before tamping, a method known as the Weiss Distribution Technique (WDT). A leveller then flattens the top surface to a set depth. If your grinder produces fluffy, clump-free grounds, a simple tap on the bench and a careful tamp may be enough.
Stock baskets are stamped, and the size and spacing of the holes can vary. Precision baskets are manufactured to tighter tolerances, so water flows more evenly across the whole puck.
The Gaggia Filter Nanotech Pro 20g has 661 holes engineered for uniform extraction and takes a 20 g dose, which gives you room to push your recipe beyond a standard double.
A bottomless portafilter removes the spouts so you can watch the shot form on the underside of the basket. It is a diagnostic tool before it is anything else. If coffee sprays, spurts or runs pale on one side, you are seeing channelling in real time, and you know exactly where to look.
The Gaggia Ash-Wood Bottomless Filter Holder is built for the Gaggia Classic. It will not improve a shot by itself, but it shows you what to fix.
A dosing cup catches the grind so you can weigh, shake and transfer it cleanly. It also makes single dosing tidier. The Eureka Dosing Cup is stainless steel and sized for espresso doses.
Yes, but a completely different set. Automatic and bean-to-cup machines grind, dose, tamp and extract internally, so tampers, funnels and levellers do nothing for them. What they need is maintenance, because their milk circuits and brewing units cannot be cleaned by hand. Most accessory guides only cover manual machines. Here is how the two kits compare:
| Accessory | Manual espresso machine | Automatic / bean-to-cup |
|---|---|---|
| Scale with timer | Essential | Not needed |
| Tamper and tamp mat | Essential | Not applicable |
| Dosing funnel | Recommended | Not applicable |
| Knock box | Essential | Not applicable |
| Milk jug | Essential | Only for manual steaming |
| Milk system cleaner | Only if steaming | Essential |
| Descaler | Essential | Essential |
| Cleaning tablets | Essential | Essential |
| Milk fridge | Optional | Recommended for offices |
| Replacement carafe | Not applicable | Model-specific spare |
For automatic owners, the Automatic Machine Starter Pack includes descaler, Cafetto S15 cleaning tablets, a 400 ml milk pitcher, six espresso cups and 1 kg of coffee. For ongoing care, the Automatic Coffee Machine Cleaning Pack plus Milk Cleaner adds a dedicated milk frother cleaner to the descaler.
If your machine draws milk directly from the bottle, a 2 Bottle Milk Fridge has a pre-drilled hole for the milk tube and keeps milk cold beside the machine. It is the most common upgrade in office coffee setups.
Clean the group head daily, backflush weekly and descale every one to three months depending on how hard your water is. The schedule below covers a typical home manual machine.
| How often | Task | What you need |
|---|---|---|
| After every drink | Purge and wipe the steam wand | Microfibre cloth |
| Daily | Rinse basket and portafilter, brush the group gasket | Group head brush |
| Weekly | Backflush with detergent (machines with a three-way valve) | Blind filter, cleaning tablets |
| Weekly | Run the milk circuit clean (automatic machines) | Milk system cleaner |
| Monthly | Clean the grinder chute and hopper | Grinder brush |
| Every 1 to 3 months | Descale the boiler | Descaler |
Always check your machine’s manual before descaling. Some machines with stainless steel or brass boilers have specific instructions from the manufacturer.
It depends on where you live, because tap water hardness varies widely between Australian cities. Hard water leaves calcium deposits in the boiler and heating element, which slows heat-up, reduces flow and eventually causes faults.
Water hardness is measured in milligrams of calcium carbonate per litre (mg/L). Under 60 mg/L is considered soft. Over 120 mg/L is hard. The Australian Drinking Water Guidelines set 200 mg/L as the aesthetic limit.
| City | Typical hardness (mg/L) | Suggested descaling interval |
|---|---|---|
| Melbourne | 15 to 30 | Every 3 months |
| Sydney | 30 to 50 | Every 2 to 3 months |
| Brisbane | 53 to 115 | Every 2 months |
| Adelaide | 87 to 136 | Every 6 to 8 weeks |
| Perth | 29 to 228 (suburb dependent) | Every 4 to 6 weeks in most suburbs |
| Tank or bore water | Often very hard | Every 4 weeks, plus filtration |
Hardness ranges based on Water Corporation, SA Water and other utility data compiled by WaterScore (2026). Check your own suburb, as figures vary within each city.
Perth is the outlier. Hardness ranges from soft in the hills to very hard in the northern suburbs, where groundwater makes up much of the supply. If you live in Wanneroo, Joondalup or similar areas, treat monthly descaling as a minimum and consider a filter jug for the water you put in the tank.
Melbourne has the opposite issue. Its water is so soft that scale builds slowly, but very soft water can also make espresso taste flat, because minerals help extract flavour from the coffee. Descale on schedule, but do not filter already-soft water further.

Cup choice affects temperature and crema more than most people expect. A double shot in a thick mug spreads the crema thin and loses heat within a minute. A proper espresso cup holds a shot in a smaller, deeper space and keeps it hot.
Preheat every cup, either on the machine’s cup warmer or with a splash of hot water. A cold ceramic cup pulls heat out of a 36 g shot almost instantly.
Browse the cups range for Gaggia espresso and cappuccino cups designed with the International Institute of Coffee Tasters.
You can skip most decorative and duplicate tools. The accessory market is very good at selling solutions to problems most home setups do not have.
Plan on roughly 10 to 20 percent of your machine’s price, spread over the first six to twelve months rather than all at once.
| Stage | What to buy | Who it suits |
|---|---|---|
| Starter | Scale, tamper, tamp mat, milk jug, knock box, cleaning basics | Anyone who has just bought a machine |
| Refinement | Dosing funnel, precision basket, dosing cup, proper cups | Six months in, chasing consistency |
| Complete | Bottomless portafilter, automatic tamper, milk fridge, spare parts | Multi-drink households and offices |
If you are buying a machine and grinder together, check the current bundles, several of which include bonus coffee, tampers or tamp mats.
A scale with a shot timer. Every adjustment you make to grind, dose or ratio is guesswork until you can measure what goes into the basket and what comes out into the cup.
You can, but it is rarely the right size. Included tampers are often light plastic and run a millimetre or more under the basket’s internal diameter, leaving a loose edge where water escapes. Measure your basket and replace it.
Yes, if you use a manual machine daily. Tapping the portafilter on a bin damages the basket rim over time, and a knock box keeps grounds out of the sink and drains.
It is worth it once your basic technique is consistent. A bottomless portafilter shows you exactly where channelling is happening, which makes it the fastest way to diagnose distribution and tamping problems. It does not improve a shot on its own.
Yes. Automatic machines need descaling at least as often as manual machines, and they also need regular milk-circuit cleaning because the internal tubing cannot be cleaned by hand.
A 350 to 400 ml jug for single drinks, or a 600 ml jug if you regularly make two drinks at once. Fill to just below the base of the spout so the milk has room to expand.
Common signs include slower water flow, longer heat-up times, cooler shots and a louder pump. Do not wait for these. Descale on a schedule based on your local water hardness.
The accessories that matter most are not the expensive ones. They are the ones that fit your machine, that you use every day, and that keep your equipment running the way it did on day one.
Browse the full Coffeeteca accessories range with free shipping Australia wide, or get in touch and tell us which machine you run. We will tell you exactly which sizes you need, and which accessories you can skip.